
I launched my self hosted website (kulasangeles.com). Hope to see you all there. Thanks.
Getting a Family Doctor
Previously I shared about how we got our OHIP and I also talked about getting a family doctor. This is something new to us, or maybe it was called differently in Singapore and in the Philippines but a family doctor as per the settlement.org site are usually the first doctors to diagnose and treat most medical problems. If you need to see a specialist doctor, usually, you need a family doctor to refer you. Family doctors also order laboratory and other tests.
Singapore, I believe (I’ve only been in a clinic once) has General Practitioners which refers you to a specialist and orders lab tests depending on your case. If you go directly to a specialist, without a referral from a GP, usually it will not be covered by your health insurance and it will cost you a lot. I remember paying SGD$200 for the specialist’s professional fee and medicines (yeah, doctors in a clinic usually include medicines in your payment).
In the Philippines, I believe we also have GPs but I think I haven’t been to one. Usually our HMOs cover the fee for specialists so whenever we are sick, we go directly to specialist rather than a GP.
I think both Singapore and Philippines doesn’t tie you to a specific practice or family doctor and you can visit any walk-in clinics without any issue but it’s the other way around here in Canada. When you are tied to a specific family doctor/practice, they strongly advise you not to visit walk-in clinics due to some factors such as your medical records will be scattered and that it will reflect badly on your family doctor for not catering to his/her responsibility to you. Once you enter in a family practice agreement, there is contract between you and the doctor, as well as contract between the doctor and the province that we will take care of almost all of your health needs. Though this is kind of new to me, this link gives a clear discussion on the issue of walk-in clinics vs family doctors.
There are two ways to do this, one is through health care connect and another is to use Ontario’s database for doctors.
So on to our search for a family doctor, we used both Health Care Connect and the doctor’s database. For health care connect, we filled out the online form and waited for them to call us. Note that for you to be eligible for this program you need to:
- not have a family health care provider at this time
- have a valid Ontario Health Card
- have an up-to-date mailing address
The next day, I got a call from Health Care Connect regarding a match and gave us the contact number for us to schedule our first appointment. I called on July 20 and the earliest possible date is September 27, that’s more than two months but we booked the date nonetheless.
For the database search, we filtered the doctor’s location (near our house), language of service (Filipino) and Physician Type (Family Doctor). Database returned quite a few names mostly Filipino doctors and we filtered it out further as to which doctor is the nearest to our location. I called the clinic and was told that they’ll call me in a week or two regarding the Filipino doctor’s availability. True enough, after two weeks they called me asking when we would like to be scheduled.
We had our first appointment last September 7, this is like a meet-and-greet session and the doctor will ask you to undergo some lab tests (also covered by OHIP) in preparation for the first physical exam two weeks after. If you are lacking some vaccines, the doctor will advise you to be vaccinated during the physical exam day (I have to be vaccinated for Hepa A,B and Tetanus). We also learned that children here do not take vitamins and that Cherifer does not work. 😀
So after our first appointment with the Filipino doctor, we felt that he’s the right match for us and I notified health connect that I will not be pursuing their recommended doctor because we already found one.
Getting our Ontario Health Insurance Plan (OHIP)
Except for the usual asthma attacks when I suffer from cold, I rarely get sick. That’s what I thought before coming to Canada. That’s the reason why we didn’t follow the advice of getting a temporary health insurance while waiting to be covered by the Ontario Health Insurance Plan (OHIP). Within three months, I had to visit a doctor twice due to staph infection. As to why I’m having it now, I have no idea. One visit to the clinic, if you are not covered under the OHIP, costs around $70 to $100. Prescription medicines are another story.
In Ontario, you need to wait for 3 months after you landed or settled in Ontario before you become eligible for the health insurance plan. Waiting time differs depending on the province you are in. To celebrate our third month here in Toronto, we applied for our OHIP. 😀 As usual, dealing with government agencies here is easy, efficient and hassle-free, if you come prepared.
Aside from the form you have to fill-out, you need to show the following documents:
- Proof of Canadian Citizenship or OHIP-Eligible Immigration Status – We used our COPR for this one.
- Proof of residency in Ontario – A document that contains your name and address. I used my driver’s license for this one.
- Proof of Identity – We used our passports.
For other documents that you can use, check this link.
Tip: Be sure that you and your spouse have at least one billing statement being physically mailed under your names as this is the easiest way to have your proof of residency.
Most of our billing statements are named after me and though we have a joint bank account, we opted for paperless statements which is not accepted as proof of residence, even if printed or photocopied. Luckily we have a Universal Child Care Benefit (UCCB) correspondence under my wife’s name with our address in it, she has to come back to Service Ontario to file her application the next day though.
Basically, if you are covered under OHIP, the government will pay for almost all medical needs but will not cover the following:
- Ambulance transportation services if not deemed medically necessary (maximum cost of $240).
- Routine eye examinations for people between the ages of 19 and 65.
- Glasses and contact lenses.
- Some physiotherapy may be partially covered or not at all.
- Routine dental services such as examinations, fillings, cleanings and non-surgical extractions.
- Podiatrists are only partially covered by OHIP.
- Paramedicals such as chiropractors, massage therapists, naturopaths, podiatrists, acupuncturists and osteopaths.
- Necessary emergency medical treatment obtained outside of Canada (e.g. while traveling) is only covered on a very limited basis; it is highly recommended to have travel insurance protection if traveling outside of Canada. Out of province ambulance costs are not covered.
- Prescription drugs, although assistance MAY be available.
- Any cosmetic surgery.
- Semi-private and private rooms in a hospital.
See more details at: https://www.healthquotes.ca/OHIP-Ontario.aspx#sthash.7xyu0xgA.dpuf
Most of the services not covered by OHIP may be covered by a personal health insurance plan or through a group insurance plan usually provided by your employers.
We’ll start looking for a family doctor soon and I will share how we did it. Until next post.
30
It’s my 30th birthday today. I feel old but happy.
Time seems to slip very fast after you start working. When you have too many things to do, too many responsibilities to shoulder and too many dreams to fulfill; time really flies. Still, I’m very thankful for all the blessings that God has given me and my family.
Looking back, I did accomplish some of my dreams.Who would have thought that I’ll take a graduate degree and finish it with flying colors? I was able to help my family financially, buy a car and a condominium unit, had the chance to work in Singapore and met new friends. I was able to use my talent in serving God and just recently, we migrated to Canada. Aside from these, there were other countless blessings in my 30 years of existence to be thankful for.
Looking forward, there are still dreams that I want to achieve. I hope I’ll be able to give our daughter and our future children the best education and the best life they can possibly have, build our dream house here in Canada, have a business so I don’t have to work for anybody anymore, retire early, play golf and just live life.
To all my friends, family and colleagues who have greeted me, thank you very much. You made my 30th a special one. Cheers to life beyond 30.
How I Got a Full-time Job in Canada
I have been very blessed and of course extremely lucky to have secured a full-time job 3 days before landing in Canada and to add a cherry on top, this job is the same job I have been doing for 8.5 years.
It was not easy. I tried applying for jobs even before entering the Express Entry hoping that a Canadian company will take notice of my resume and hopefully offer me a job which will boost up my points. It did not happen until 3 days before our flight.
Before entering the Express Entry, I prepared my resume, the same old resume that got me jobs not just in the Philippines but also in Singapore. At that time, I had great faith that this resume will outshine other applicants in a job I am applying for and will land me a job in Canada but it didn’t. What I usually get, if I’m lucky, is a reply from a job application stating, “We have considered your skills and we regret to inform you that we decided to pursue other candidates blah blah blah.” Seriously, I always stop reading after the “regret” word and wished that they didn’t reply at all, just so I have that tiny hope that they are going through my resume and they are just thinking how much salary to offer me. I was quite hopeful during those times.
My personal statistics is out of 10 applications, 1 will give me the “regret” reply, 9 of them will just ignore me. So after months of applying, a year in fact, I convinced myself that I won’t get a job unless I’m already in Canada, or so I thought.
Two months before landing in Canada, I reached out to a firm called JVS Toronto (https://www.jvstoronto.org/pre-arrival/canprep/) for their CanPrep program. Just a disclaimer, this is not in any way an advertisement for them, but they did help me a lot. This is a free service for soon-to-be migrants to help them get a job through a series of trainings and one on one meetings with a career coach. One thing that helped me a lot is the training in resume building. So yes, the secret, if you want to call it that, is your resume.
It turned out that my resume is not tailor-made for the Canadian job market even though it looked very good for the Asian market. You can check google on how to create one and I’ll be showing you an excerpt of my before and after resume.
I am in the IT industry doing software automated testing. Before, my resume looks like this:
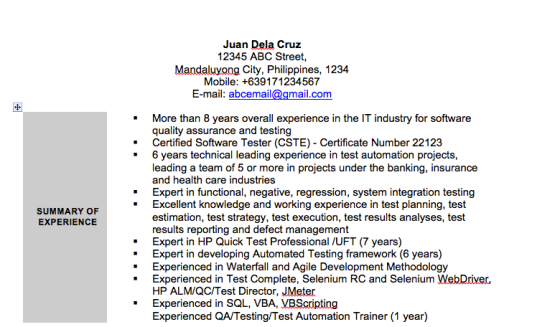
After taking the online training and doing some research, it now looks like this:
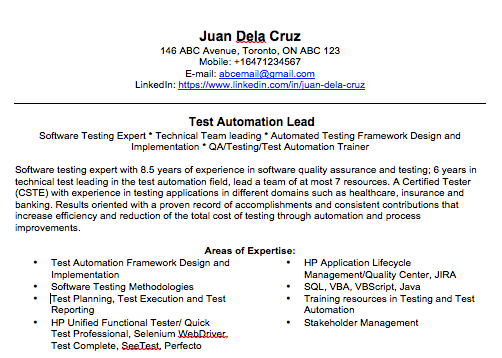
What I did basically was to let the hiring manager know what I can offer in ten seconds by simplifying my resume. All my accomplishments, education and professional experience are just supporting details. I also put my Canada address and a Canadian mobile number. I used Spikko’s (https://secure.spikko.com/) services for this one.
As soon as I did the changes, my stats became 1 interview request per 20 applications. For me, it is not bad since I’ve spent almost 1 year of countless hours looking at job boards and more than 200 applications for possible jobs without getting any interview requests. Getting at least 5% chance securing an interview is already heart warming.
I’m not an expert in job hunting nor creating a sellable resume, but based on my experience, the points below worked for me.
- Tailor made your resume to the Canadian job market (if possible, per company and job description). Don’t lie about any of the content.
- Look hard enough for job openings and you must be willing to spend at least an hour weekly to browse through different online job boards (if you have network in Canada, try to connect with them, most job openings are not posted online and can be applied through referrals)
- Most importantly, pray. It makes the difference.
Things to Do on the First Few Weeks
After 1.5 years of planning and preparation, we’re here in Canada and it’s really cold. Coming from a very hot summer in the Philippines, you’ll feel the coldness to your bones and it’s not even negative yet. We have to prepare for winter, it’s all that I can think of at that time.
We arrived on a Saturday night and spent the whole Sunday resting if you can call it that because we were already awake at 4 in the morning. The first thing to do is to get accustomed to the time difference. Jet lag is REAL. We needed at least two weeks to adjust. Tip, try not to sleep (including your baby) during the day and try to sleep early at night. That worked for us, adjusting our sleep and wake up time an hour per day.
With my work starting two weeks from our arrival day, we thought we have time to tour around but it’s really hard and expensive if you don’t have a car. Also, it’s very cold so most of the time we just stayed at home. Good thing my cousin and her family as well as a brother from The Feast Singapore and his family were gracious enough to tour us around and check up and help us from time to time.
The first Monday, we secured our Social Insurance Number (SIN) from a nearby Service Canada. You just have to bring your Certificate of Permanent Residency (COPR) to the office, give them your address, ensure that your name is correct and they will issue your SIN in a printed paper with your details on it (they don’t issue the card anymore). It will only take you at most 30 minutes, because yes, just like in Singapore, they are very efficient.
We also opened a bank account the same day. Most of the Banks in Toronto/Canada have programs for new residents. We were looking at Scotia Bank, TD, RBC and CIBC. All of these banks have almost the same offerings. In the end, we settled with Scotia Bank, because it’s the nearest bank near the subway station. 😀
Bring your COPR, SIN and Passport when applying for a bank account. Having a COPR will make you eligible for an unsecured credit card with a limit of $2000 (each bank may differ). Yes, you need “credit” here to build your credit score. Unless you have an awful lot of cash, you won’t be able to afford most of the necessities here without a decent credit score.
You can also start doing the following:
- Look for work if you have none yet, hopefully it will be easier now that you’ve landed.
- Look for a permanent house and buy a car if you need it (easier if you already have a job)
- Apply for Canada Child Tax Benefit (http://www.cra-arc.gc.ca/cctb/)
- Apply for OHIP (Ontario Health Insurance Plan, http://www.health.gov.on.ca/en/public/programs/ohip/), but you will only be covered after three months of stay in Ontario (other province has different length of stay requirement to be eligible)
- Apply for a Driving License (https://www.ontario.ca/page/get-g-drivers-licence-new-drivers)
- Get a Private Health Insurance (if you want to have coverage while waiting for OHIP)
This is can also be a very good resource for new comers: http://settlement.org/downloads/First_Days_Guide_EN.pdf
So to sum everything up, you need to adjust to the cold weather, jet lag exists, try to stay awake during the day and sleep at night and most importantly, prepare yourself because you have a lot of adjusting, researching and applying to do.
Until next post.
Our Journey to Another Land: The Flight
I have 5 more days to go before I start work (I’ll be sharing my experience in another post) and with a lot of things to share, I am using whatever free time I have left to write.
April 17, 2016 is our flight date, we’re flying with Philippine Airlines bound for Toronto with a technical stopover in Vancouver. We stayed in a hotel near the airport for easy and hassle free ride to the airport. But yeah, hassle happens.
Our flight tickets indicate that our departure port is at the Main Terminal and all along we assumed that it is NAIA Terminal 1. After saying our goodbyes to our family, we rode an Uber to the “Main Terminal” 4.5 hours before the flight. Since we have a lot of time, we tried to relax and enjoy our last few hours in Manila.
We are about to enter Terminal 1 when the guard who asked for our tickets told us that we are at the wrong terminal and that we are supposed to be in Terminal 2. After I did some verifications (through the information section and of course the internet), we are indeed leaving through Terminal 2 (PAL’s Main Terminal). With 3 hours to go, we arrived at Terminal 2.
Unfortunately, there were many passengers at that time and we have to queue for 30 minutes just to enter the terminal. Here you’ll see people bribing airport employees just so they can enter the terminal instantly. This is one of the reasons why you’ll want to leave the Philippines.
We are supposed to do a web check-in and since PAL’s online applications are so reliable, we were not able do a web check-in and have to do it the old fashion way. After another 45 minutes, we were able to secure our boarding passes. Note that you need to pay travel taxes for all the people who will be travelling with you. You can look up the rates here http://tieza.gov.ph/travel-tax/. We paid a total of PHP 4250 for two adults and one minor.
After securing our boarding passes, we went to the immigration officer. Here, they will ask for your passports. You have to tell them that you will be migrating. They will then validate your PDOS sticker, your visa, as well as your passport details. It usually takes around 5 minutes if there’s no problem. After an agonising 3.5 hours we arrived at our gate. We boarded at round 3PM and due to some circumstances, we flew at around 430PM (1.5 hours delayed).
The seats that were provided to us were very comfortable with excellent leg room. We were transferred to a better Choice Seat. This is our first long haul flight and it was a good experience (at least the inflight experience with PAL is good). We arrived in Vancouver after 12 hours. Some passengers alighted here while Toronto-bound passengers stayed on the plane. After an hour, the plane continued its flight to Toronto for another 4.5 hours. We arrived at around 9PM Toronto time, 25 minutes earlier than the estimated arrival.
Be sure to fill-out the arrival card (one per family, be sure to declare monetary instruments that are more than CAD 10,000) provided by the flight attendants that will be presented to the Canadian immigration officer. After presenting your passports to the immigration officer, they will ask you to queue to another room where they process new residents. Here, you will present your Certificate of Permanent Residency (COPR), passports and other documents for after around 45 minutes. Then, they will welcome you to Canada and will tell you that your PR Card will be sent to your indicated address in 4-6 weeks. They will also give you an instruction sheet on how to update your address if ever you will be changing your address.
You will now collect your luggages and will proceed to customs. Here you will declare monetary instruments exceeding CAD 10,000 and if the customs officer deemed necessary, a detailed list of all belonging accompanying you and those that are to follow. The officer only asked for the E677 – CROSS-BORDER CURRENCY OR MONETARY INSTRUMENTS REPORT form and after that, we were able to exit the airport. We were welcomed by my cousin and a brother in The Feast.
It has been a week and three days since we’ve arrived and we are still adjusting to the time difference and of course, the cold weather. This post ends this section. I’ll be starting a new section soon where I will share all our experiences here as new permanent residents. Until next post.
Our Journey to Another Land: Things to Bring
Before flying, we made a checklist on what to bring. This will ensure that we have all the needed documents before we move out of the country. It’s actually not so hard to research since most web sites and blogs have a section on “things to do/bring before landing”.
My favorite sites for these kind of research are either canadavisa.com forum or settlement.org. Be sure to bring whatever you think you’ll be needing since it will be hard for you to get these documents/things once you’ve landed.
| To Bring | Description |
| Passports | Must not be expiring within 6 months |
| Confirmation of Permanent Residence Form | This document should be included when they give you your visa, one for you and one per individual coming with you. |
| B4E – Personal Effects Accounting Documents (Accompanying items)
B4A – Personal Effects Accounting Documents (Items to follow) |
All items listed here will be tax free.
Downloaded here: B4E: http://www.cbsa.gc.ca/publications/forms-formulaires/b4-eng.pdf B4A: http://www.cbsa-asfc.gc.ca/publications/forms-formulaires/bsf186a.pdf |
| E677 – CROSS-BORDER CURRENCY OR MONETARY INSTRUMENTS REPORT
|
If you are bringing more than CAD 10,000 (cash and any other monetary instruments) you need to declare this with the Canadian customs.
http://www.cbsa-asfc.gc.ca/publications/forms-formulaires/e677.pdf |
| Foreign Currency and Other Foreign Exchange-Denominated Bearer Monetary Instruments Declaration Form
|
This is the counterpart of form E677 in the Philippines.
http://www.bsp.gov.ph/publications/tables/2012_11/news-11132012a1.pdf |
| Birth Certificates | Bring at least two copies per person. This can be ordered online now through this site: https://www.ecensus.com.ph/Default.aspx |
| Marriage Certificates | Bring at least two copies. This can be ordered online now through this site: https://www.ecensus.com.ph/Default.aspx |
| Medical Records | Bring all medical records, including the one you’ve submitted during your medical exam. This should be typewritten. |
| Dental Records | Ask your dentist for your dental records. Our dentist used the form from the Philippine Dental Association. |
| Children’s Vaccination Form | If you have children coming with you, be sure to have their pediatrician list down all the vaccines administered to your children. The form should also be included in your Visa pack but, if it’s missing, you can download it here: http://www.chinacanada.ca/ss/down/immunization.pdf |
| IELTS | Bring your original IELTS results |
| ECA | Bring your original Education Credential Assessment document |
| Transcript of Records | Bring at least two original or certified true copies of Transcript of Records coming from your school |
| Diploma | Bring the original diploma |
| COE | Bring original certificates of employment from all the companies that you and your wife worked for |
| Drivers License | Bring driver’s license and receipt |
| LTO Certification with Red Ribbon | Bring original document. Note this document has a 6-month expiry. |
| Bank Draft and Canadian Dollars | Bring all monetary instruments with you, you must declare if more than 10,000 |
| Medicines | Bring medicines, especially if you have maintenance meds |
In filling out the personal effects accounting documents, you need not list down everything per piece (although this one is advisable). You can lump it into logical groups such as clothes, gadgets, shoes, food, etc. In our case, the customs officer didn’t ask for this form and told us that the goods to follow form is what matters.
We still have jet lag, thus this post at 6 in the morning EST. Until next post.
Our Journey to Another Land: Getting your DFA Certified LTO Certification (Red Ribbon)
A week before our landing, after much pondering, I decided to get an LTO Certification with Ribbon so I can drive in Canada under G2 license without having to undergo G1 (Student License) training and examination (http://settlement.org/ontario/daily-life/transportation/driver-s-licence/i-have-a-driver-s-licence-from-another-country-how-do-i-get-an-ontario-driver-s-licence/)
Surprisingly, this process is not too tedious. Overall, even though I’m dealing with two Philippine government agencies, it just took me a total of 35 minutes, which by Philippine government service standards is extremely rare. Anyway, below are the steps you need to do:
LTO Main Office (5-10 minutes to complete)
- Photocopy your Driver’s License and License OR (do bring the original document)
- Go to LTO Main Office located on East Ave, Quezon City
- Go to Window 10, you can ask the security guards, it is within the vicinity of the chapel
- Usually, there’s no line so just approach the officer and tell him/her that you’ll be applying for a DFA certified LTO Certification. Give them the photocopy of your license and OR.
- The officer will give you a stub and will ask you to pay in Window 3.
- Return to window 10 with the receipt, the officer will give you a claim stub that you will use when claiming the LTO certification from DFA Aseana after 5 business days (claim date is indicated in the stub)
DFA Aseana (30-40 minutes to complete)
- Go to Gate 2 then drop your claim stub in window 4 (Be sure to check the claim date in the stub to ensure that your LTO has already forwarded your certification to DFA.) then wait for your name to be called either from window 5 or window 7.
- Once your name is called, the officer will give you a payment slip that you need to bring to window 9 (Be sure to remove the stapled payment slip from the other documents to avoid delay). The cashier will give you a receipt.
- Bring the receipt together with all the documents given to you in window 7 or 5 to window 9 and write your name in the claimant registration form. Sit down and wait for your name to be called again.
- Once your name is called (either from window 5,6 or 7), line up and get your DFA Certified (red ribbon) documents. Ensure that you have two documents (the DFA certification and The LTO certification) and that the details are correct.
Although the process is quite fast, I believe they can make it faster. Maybe by having a DFA processor in LTO or the other way around.
I’m lagging behind on my blog posts, as of writing, I’m already in Canada and I’m writing this entry at 3AM due to jet lag. The next post will be about our departure and arrival.
Our Journey to Another Land: Securing the Pre-Departure Orientation Seminar (PDOS) Sticker
We’re almost ready to fly to Canada in two weeks time, but before that, we need to secure a Pre-Departure Orientation Seminar (PDOS) sticker from the Commission on Filipinos Overseas (CFO). Immigration officers need to see this attached to your passport before they put a stamp during your departure from the Philippines (note that if you’ll be travelling from any country other than the Philippines to Canada, you may not attend the seminar, but this is not recommended.)
So what is PDOS and why do you have to secure one? PDOS is a free country-specific seminar conducted by CFO for people immigrating to different countries, note that this seminar is different from the one being conducted by POEA which is specifically for Overseas Filipino Workers (OFW). In this seminar, they will tell you high-level information about the pre-departure processes and information, departure and landing processes, what to do as soon as you arrive in Canada, how to maintain your PR and how to get Citizenship to name a few. Personally, I find this seminar really helpful and yes, I recommend my fellow countrymen to attend this seminar.
Fortunately, starting April 11, 2016, they will be implementing the online registration fully for CFO Manila office and no walk-ins will be accepted anymore. This means that you can now select the date and time of the seminar that is most convenient for you. They conduct seminars from Mondays to Fridays at 930AM-12Noon for Canada bound immigrants. You can visit https://cfo.ph/PDOS_Reservation/ for reference.
You’ll be needing the following documents on the day of your seminar:
- Original and photocopy of passport (must be valid about six months before date of travel)
- Original and photocopy of visa
- Original and photocopy of Confirmation of Permanent Residence for Canada-bound emigrant (must not be torn or signed before departure).
- One (1) 2×2 or passport-size photograph
- One (1) valid identification card with photograph (eg., SSS ID, GSIS E-card, PRC ID, driver’s license, postal ID, ARC, etc.)
- Payment of Php 400.00 registration fee
- Photocopy of employment contract (for immigrant workers)
The filling-out of forms is really tiring. Ensure that you are entering the correct details. Although your COPR document states that your dependents are also primary applicants, during the registration you have to ensure that you tag them as dependents. This error cost us an additional two hours of waiting and queueing (once you have a correction, they have to encode it again, which doesn’t make sense). Also, note that although children 12 years old and below are exempted from attending the seminar, you still need to register them in the system and pass the requirements indicated above to CFO.
Now that we’ve completed the last requirement for pre-departure, all that’s left for us is to fly. I’ll be sharing this experience in my next post.
